Friday, July 23, 2010

Finished... almost

Now everything is finished! Besides installing the seat, and polishing it a bit. The seat is custom built to fit the boat, so it should be here in a week or two. Then it can be taken out for a test run!
The first 3 coats of varnish I brushed on at home, and the last 3 I sprayed on in a Body Shop's spay booth. The hatch straps are very low profile, with no knobs sticking up to hold the straps. The little slits in the deck for the straps were sealed with silicon when the straps were put in.

Also, the bulkheads are now in. The bulkheads separate the front and rear storage compartments from the cockpit. That way if the cockpit fills with water, the rest of the boat will remain water free. The hatches are sealed with weather stripping.


First 3 coats on below, now it heads to the spray shop..


Saturday, June 19, 2010

Varnishing!

These two pictures have 2 coats on. Its starting to shine a bit more!


So, now I've started varnishing the hull! This picture has 1 coat on. Eventually, there will be about 6 coats.

Friday, June 18, 2010

Final Sanding!!


Today I spent 4.5 hours sanding! It went a bit quicker than I had thought, but still forever!! So now there is 1 little spot on the cockpit coaming that I had to put a dot of epoxy on which needs sanded. Otherwise, everything is ready to be varnished.
I'm planning on brushing 3 coats of varnish and then spraying on the last 3 or 4. It should be like glass. The pictures look white and dust because it is.. :) Its white because of the glass in it. Try sanding a window in your house and it will turn white too. But as soon as the varnish touches it the wood looks awesome.

Tuesday, June 15, 2010

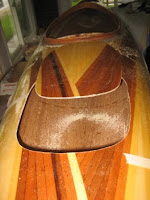
Cockpit coaming lip

As of now, the cockpit coaming has fiberglass on it and needs sanding. I still
need to put in the endpours, which is basically just a big glob of epoxy poured
down the bow and stern to strengthen it and creat a spot for grab handles. Then
once everything is sanded, I ready to varnish!!
Heres a picture of the seam between the deck and hull. After 1 more
coat of epoxy, this will be ready to sand down.


Today I started the cockpit coaming! There are 12 strips about 3/16
epoxied around the cockpit coaming. All the clamps are holding them on..

Wednesday, June 9, 2010

Pad eyes, Taping inside seam


Here the pad eye loop is in temporarily.
In this picture you can see the little holes that I cut for the hatch straps.
Little loops are stuck through and siliconed in.
I can't decide if I should put a bungie strap in front of the cockpit or not..
What do you think?


In the top and bottom of this picture you can kind of see the fiberglass
tape. Its clear though.


Awesome weather out, so work outside! Today I fiberglassed the inside
seam to hold the deck and hull together. Its on the side so that the 2 inch
fiberglass tape wont slide down the hull while it is drying.

leave a comment? ...

Tuesday, June 8, 2010

Hatches, Footbraces, Deck and Hull

Almost finished taping..

The deck and hull are connected with 2 inch fiberglass tape. It's best
to tape the 2 pieces of the kayak together, and then fiberglass the inside first.
That way the 2 pieces will line up very nicely.


The deck and hull are ready to be connected!!!


In this picture and the next one above, the hatches are finished.
They came out very smooth!


After the hatches were cut out, I taped them up with wax paper. Then
hotglued and taped them back in. With the deck upside down, I put on
the 5 layers of fiberglass.
4 layers of fiberglass and a bit of thicked epoxy are used to
make the hatch recess lip. It'll be trimmed back to 3/4 -1 inch.


Inside of the hull is all fiberglassed!!

The foot braces are held on with 1.5 inch head bolts. Fiberglass and epoxy
holds on the bolts, that way no bolts are showing outside the hull.

Leave a comment??

Monday, May 17, 2010

Cutting Hatches

Today I cut out the hatches. The plans for the kayak came
with a paper cutout so that I'd know how big to make them.
So basically, I just centered the cutout, and put tape under it.
Then I traced them with a permanent marker and cut
them out. I used a jig saw with a fine metal blade. Some
people use handmade Japanese handsaws, but a jigsaw
works good for me!

In this picture you can see the cross section of the deck.
The fiberglass on the inside of the deck is much thicker
than on the outside. It is about 1/4 inches thick.


Tuesday, May 4, 2010

Sanding and Glassing Inside of The Deck

It took 2 hours fiberglass the inside of the deck.

The fiberglass turns nice and clear when I put epoxy on it. When ever
wood is being 'finished' like putting on a thick sealer such as epoxy, it should
be done in when the temperature is dropping. Also, the humidity should be
relatively low. That is because when when the temperature is rising the
wood is releasing air, and when the temperature is dropping, the wood is absorbing
air. Releasing air means lots of air bubbles!!
The humidity should also be similar to what it was when I put the fiberglass on the
outside of the deck. Otherwise the wood will have expanded or shrunk, depending on
the change in humidity, thus, changing the shape of the deck. When the shape changes,
it makes it rather complicated to mount the deck to the hull and the end of the
process!

There are 2 layers of fiberglass on the inside of the deck.
That way it'll be ok to sit on it when you get in.
Not much sanding is needed inside the deck. Just enough
to get the bumps out and make is smooth for the epoxy to
stick. This is the last time anyone will see inside of it.
Before I started sanding, I took the separated the deck and hull.
The wood after sanding is only about 1/8 of an inch thick! The fiberglass
adds almost another 8th. So the total thickness when it is finished
will be about 1/4 inch. Right now the deck weighs just around 10 lbs!